Introduzione
Obiettivo di questo tutorial è implementare una soluzione di backup e restore di applicazioni stateful, deployate all'interno di Aruba Managed Kubernetes.
Prerequisiti
Assicurati di aver installato
- kubectl (CLI per Kubernetes);
- aws-cli (CLI per testare connessione S3);
- helm (cli per installazione Kubernetes App);
- velero (cli per effettuare e gestire backup e restore su cluster Kubernetes).
Accesso ad Aruba Managed Kubernetes
Configurazione del Cluster Aruba
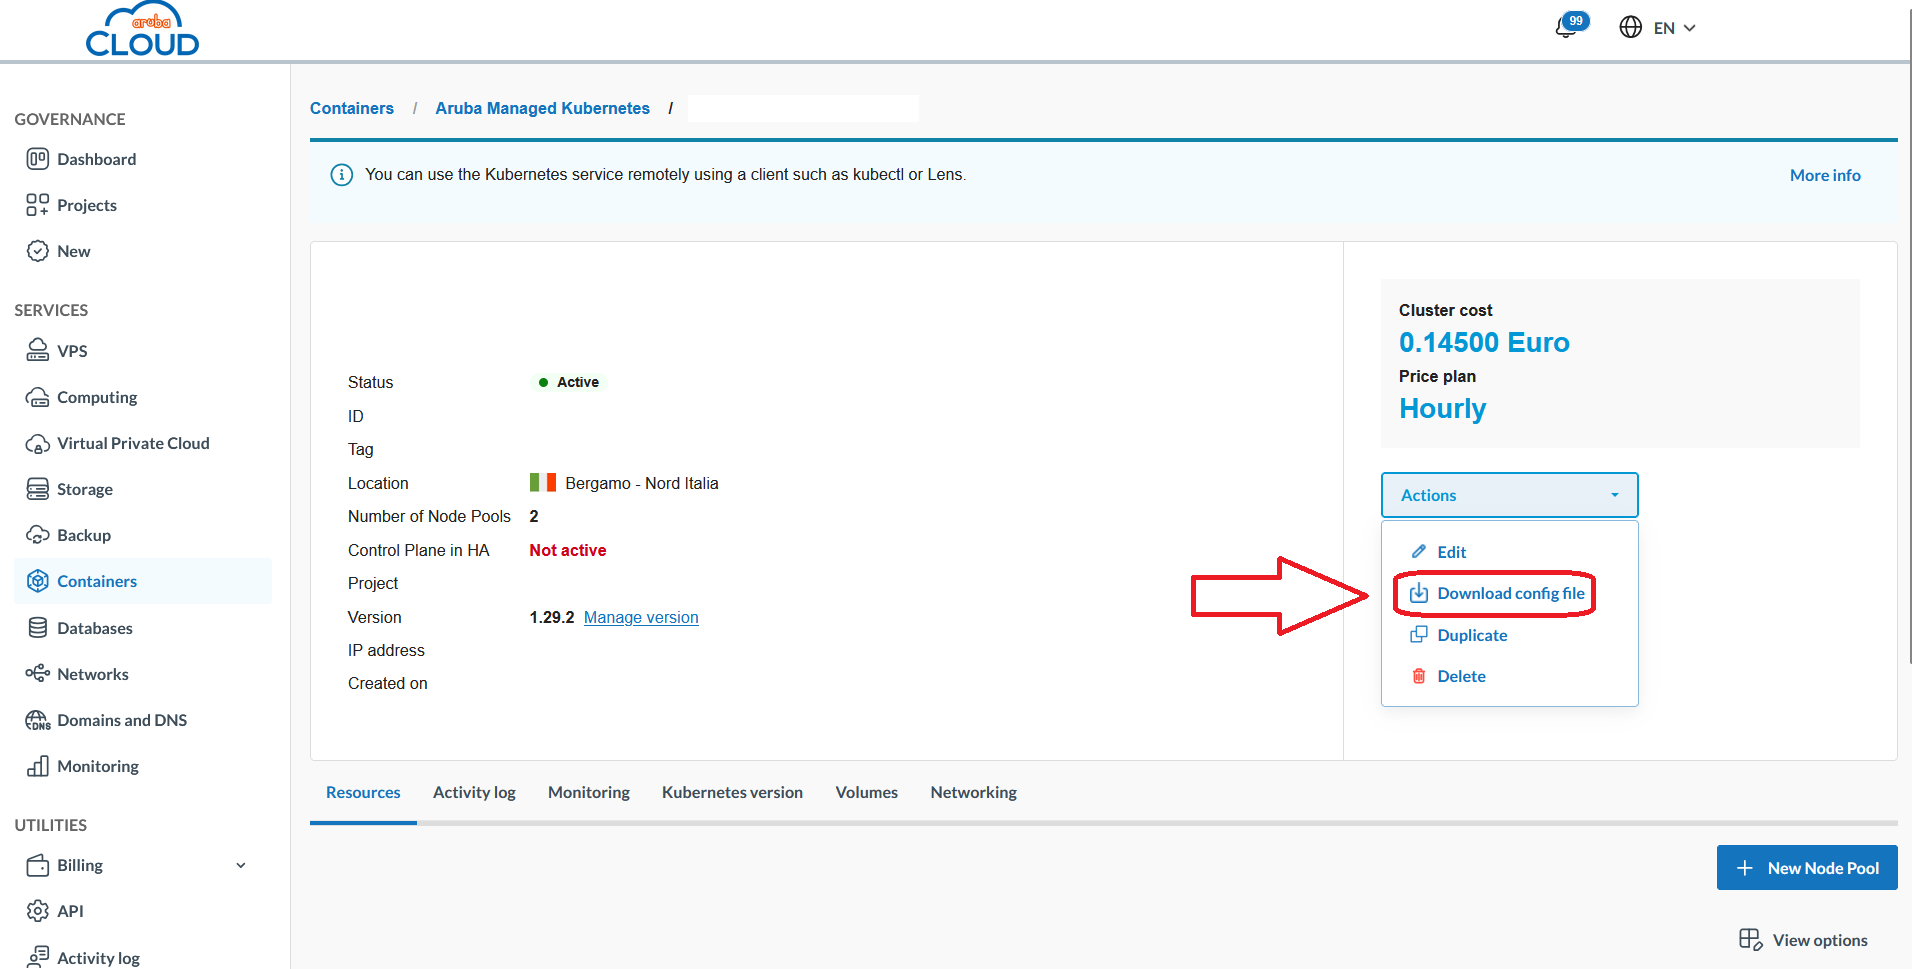
1. Accedi al portale Aruba Cloud e apri il tuo ambiente Kubernetes.

2. Scarica il kubeconfig file per interagire con il cluster tramite kubectl.
3. Imposta il contesto kubectl per utilizzare il cluster.
Setup Bucket S3 su Aruba Cloud Object Storage
1. Inizializzazione Storage Account
Per la demo è stato creato un account demo-backup all'interno della regione IT3 di Aruba Cloud.
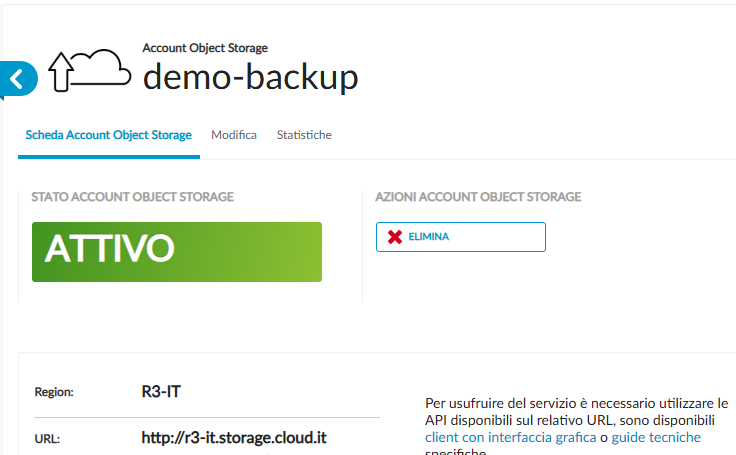
Dall'interfaccia utente recupera le seguenti informazioni:
- Endpoint URL;
- Secret Key.
2. Test Connessione S3 con Cloud Object Storage
    export AWS_ACCESS_KEY_ID=demo-backup
    export AWS_SECRET_ACCESS_KEY=
    export AWS_DEFAULT_REGION=R3-IT

    aws s3 ls --endpoint-url http://r3-it.storage.cloud.it
3. Crea un S3 Bucket su Aruba Cloud Object Storage
aws s3api create-bucket --bucket demo-backup --endpoint-url http://r3-it.storage.cloud.it
Deploy Velero
Configurazione Helm chart Values
Al momento della compilazione di questo tutorial il servizio Aruba Managed Kubernetes non supporta nativamente CSI Snapshot.
Assicurati che nell'installazione di Velero siano configurate correttamente le seguenti opzioni:
- snapshotsEnabled: false
- deployNodeAgent: true
Crea un file values yaml per inizializzare le variabili del Velero Helm chart:
    ---
    credentials:
      useSecret: true
      secretContents:
        cloud: |
          [default]
          aws_access_key_id=demo-backup
          aws_secret_access_key=

    snapshotsEnabled: false
    deployNodeAgent: true

    configuration:
      defaultVolumesToFsBackup: true
      backupStorageLocation:
      - name: default
        provider: aws
        bucket: demo-backup
        config:
          region: R3-IT
          s3ForcePathStyle: "true"
          s3Url: http://r3-it.storage.cloud.it
      volumeSnapshotLocation: []


    initContainers:
      - name: velero-plugin-for-aws
        image: velero/velero-plugin-for-aws:v1.6.0
        volumeMounts:
          - mountPath: /target
            name: plugins
    metrics:
      enabled: true
    tolerations:
      - key: node-role.kubernetes.io/master
        effect: NoSchedule
Velero Deploy in Aruba Managed Kubernetes
    helm repo add vmware-tanzu https://vmware-tanzu.github.io/helm-charts

    helm repo update

    helm upgrade --install velero vmware-tanzu/velero --version 5.1.3 --namespace velero  --create-namespace -f helm/velero-values.yaml
Verifica Deployment
velero get backup-locations
Risultato atteso per verificare che l'inizializzazione è avvenuta con successo è Phase = Available
| PROVIDER |
BUCKET/PREFIX |
PHASE |
LAST VALIDATED |
ACCESS MODE |
ACCESS MODE |
DEFAULT |
| default |
aws |
demo-backup |
Available |
2025-04-09 10:32:55 +0200 CEST |
ReadWrite |
true |
Deploy Jupyterhub
Configurazione Helm chart Values
Crea un file values yaml per inizializzare le variabili del Jupyterhub Helm chart:
    hub:
      db:
        type: sqlite-memory

    singleuser:
      storage:
        capacity: 10Gi
        type: dynamic
        dynamic:
          storageClass: "cinder"
          pvcNameTemplate: claim-{username}
          volumeNameTemplate: volume-{username}
          storageAccessModes: [ReadWriteOnce]
        extraVolumes: []
        extraVolumeMounts: []
Viene utilizzata la storageClass cinder per salvare in modo persistente i dati memorizzati nella workspace di ciascun utente attraverso la definizione singleuser.storage.type = dynamic.
Si utilizza una configurazione di hub con db in-memory, poiché ci interessa salvare lo stato solo delle workspace di ogni utente, e non le configurazioni del hub.
Jupyterhub Deploy in Aruba Managed Kubernetes
    helm repo add jupyterhub https://jupyterhub.github.io/helm-chart/

    helm repo update

    helm upgrade --install jupyterhub -n jupyterhub --create-namespace jupyterhub/jupyterhub --version 4.1.1-0.dev.git.6981.ha6872850 -f helm/jupyterhub-values.yaml
Verifica Deployment
Verifica che i pod dell'applicazione Jupyterhub siano in stato Running:
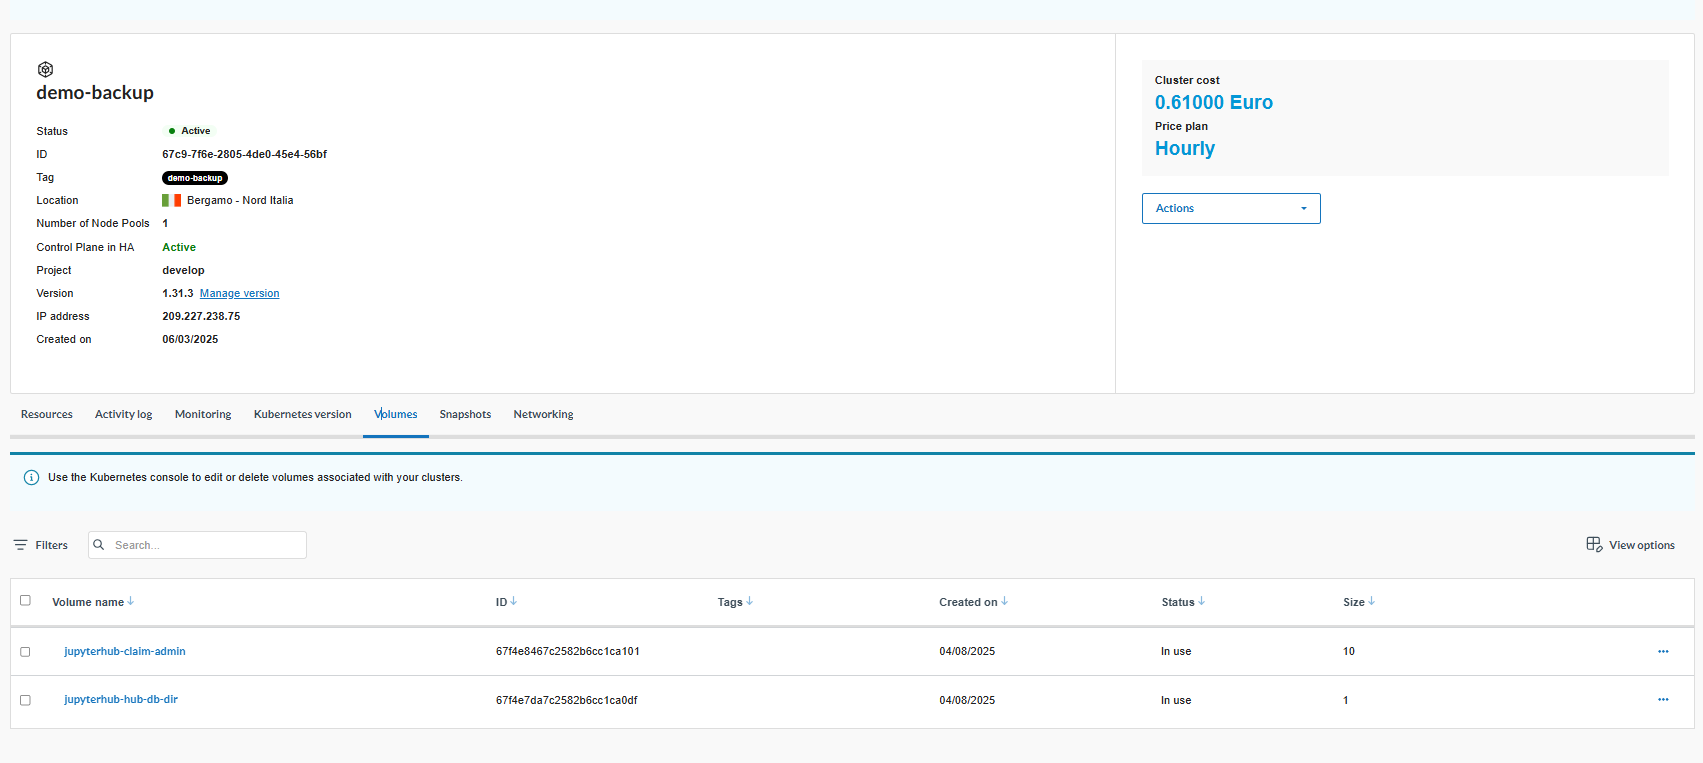
Il deploy di Jupyterhub con StorageClass "cinder" aggancia dinamicamente due volumi su Aruba Managed Kubernetes, come dimostrato nell'immagine sottostante.
kubectl get pods -n jupyterhub
Risultato atteso:
    ```bash
    NAME                              READY   STATUS    RESTARTS   AGE
    continuous-image-puller-6cbpd     1/1     Running   0          100s
    continuous-image-puller-fq4qm     1/1     Running   0          100s
    continuous-image-puller-gf2kx     1/1     Running   0          100s
    continuous-image-puller-gj9xc     1/1     Running   0          100s
    hub-89fb546c8-hmbqx               1/1     Running   0          100s
    proxy-655b7b4cc5-c9xzz            1/1     Running   0          100s
    user-scheduler-7f44675fdb-5v6tf   1/1     Running   0          99s
    user-scheduler-7f44675fdb-s8gww   1/1     Running   0          100s
Per accedere alla console Jupyterhub apri una connessione locale mediante il seguente comando
kubectl port-forward svc/proxy-public 8080:80 --namespace jupyterhub
Accedi alla console
Tutti gli script o dati che hai nella home utente sono persistenti grazie ad Aruba Cloud Block Storage integrato con Aruba Managed Kubernetes.
Test sull'ambiente
      pip install pandas
      pip install matplotlib
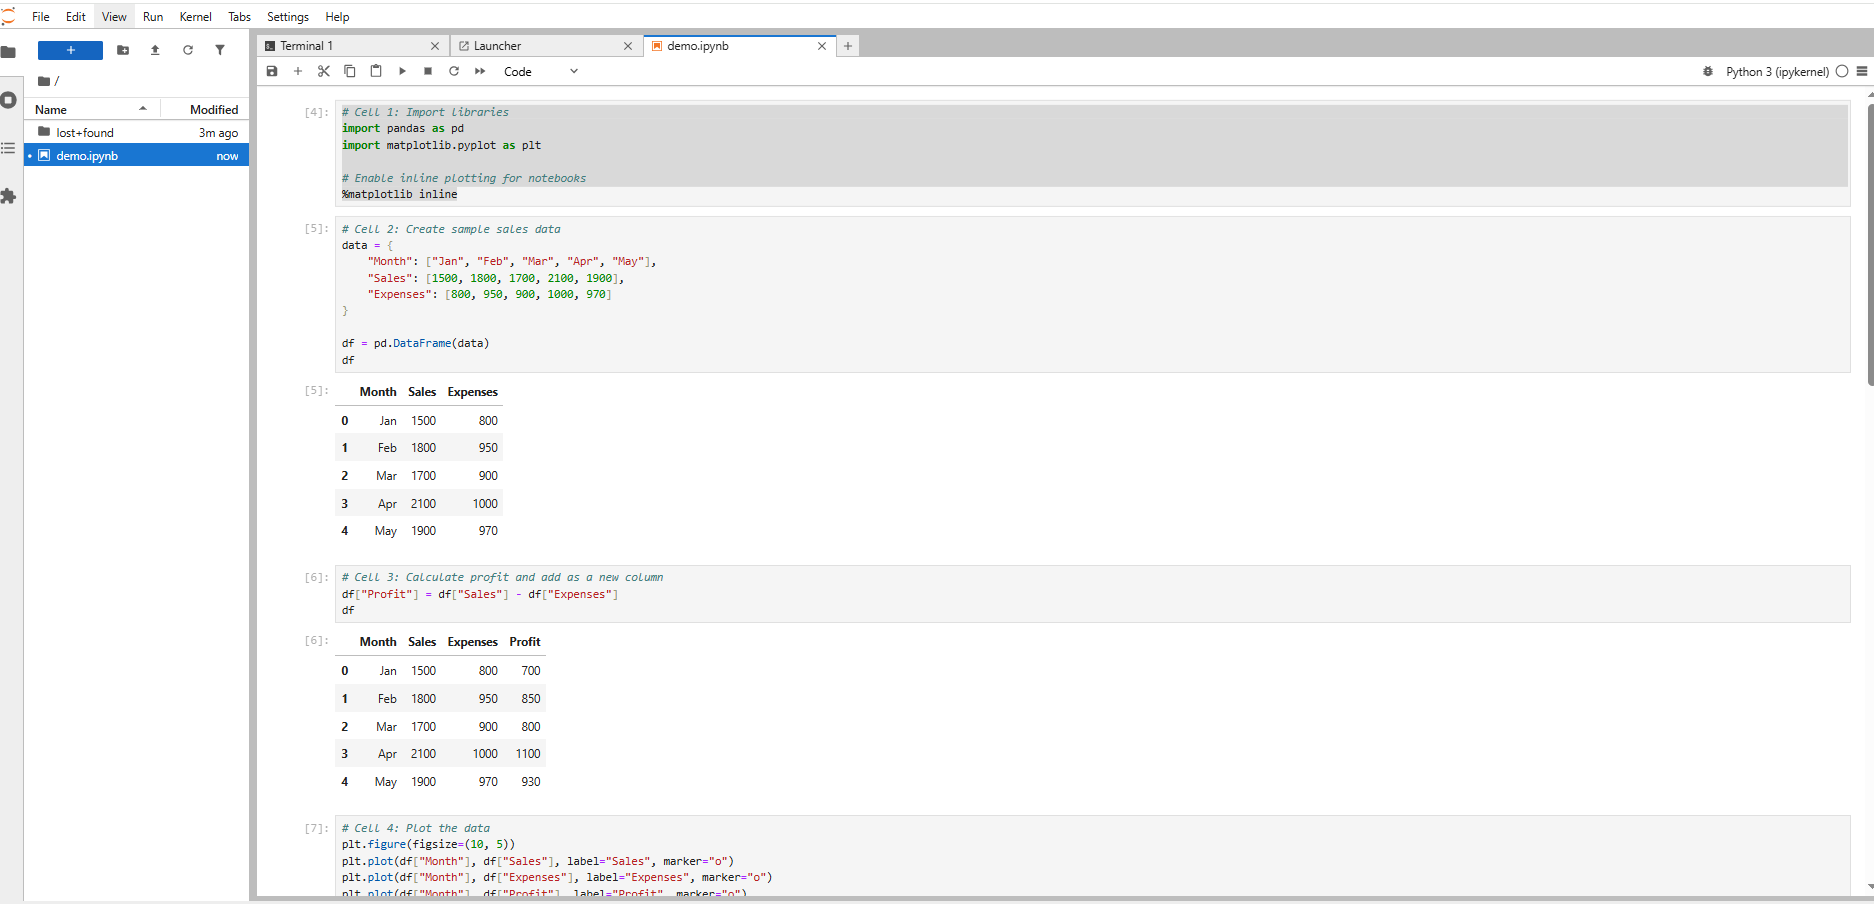
- Entra nel workspace utente in Jupyterhub ed installa le seguenti dipendenze:
- Carica lo script nel workspace ed eseguilo.
Backup dei volumi Jupyterhub
1. Creazione dell'oggetto Velero Backup
    apiVersion: velero.io/v1
    kind: Backup
    metadata:
      name: jupyterhub-backup
      namespace: velero
    spec:
      includedNamespaces:
        - jupyterhub
      includedResources:
        - "*"
      defaultVolumesToFsBackup: true
      storageLocation: default
      ttl: 168h  # Retain backup for 7 days
Deploy dell'oggetto Velero Backup
kubectl apply -f k8s/VeleroBackup.yml
Verifica lo stato del Backup
velero get backup
Risultato atteso
    NAME                STATUS      ERRORS   WARNINGS   CREATED                          EXPIRES   STORAGE LOCATION   SELECTOR
    jupyterhub-backup   Completed   0        0          2025-04-08 12:53:33 +0200 CEST   6d        default
Effettua un restore dei volumi Jupyterhub
1. Creazione dell'oggetto Velero Restore
    apiVersion: velero.io/v1
    kind: Restore
    metadata:
      name: jupyterhub-restore
      namespace: velero
    spec:
      backupName: jupyterhub-backup
      restorePVs: true
2. Deploy dell'oggetto Velero Restore
kubectl apply -f k8s/VeleroRestore.yml
3. Verifica lo stato del Restore
velero get restore
Risultato atteso
    NAME                STATUS      ERRORS   WARNINGS   CREATED                          EXPIRES   BACKUP NAME         SELECTOR
    jupyterhub-restore  Completed   0        0          2025-04-09 11:20:45 +0200 CEST   29d       jupyterhub-backup